Last week was a little crazy. I had a busy work schedule and it was my birthday. We had a BBQ poker night and that took some prep work. On Sunday after the party I went down to the you-pull-it salvage yard and found a Jeep XJ limited (I think it was a 99) that had cruise and some other misc pieces I have been looking for. I ended up being able to exchange the bad driveshaft I had purchased from them a couple of weeks ago for the entire cruise system, the vacuum system for cruise (couldn’t remember if it was already in the Jeep or not), a wood grain dash, a new cover for the shifter and a new panel for the rear defroster and rear windshield wiper that includes the fog light switch.
We went and saw two concerts over the weekend so work was stalled until Monday morning. Once that started, I got up and got the cruise installed which, if you’re considering adding factory cruise to your XJ – do it. It was super simple.
Adding Cruise
Pull the steering wheel:
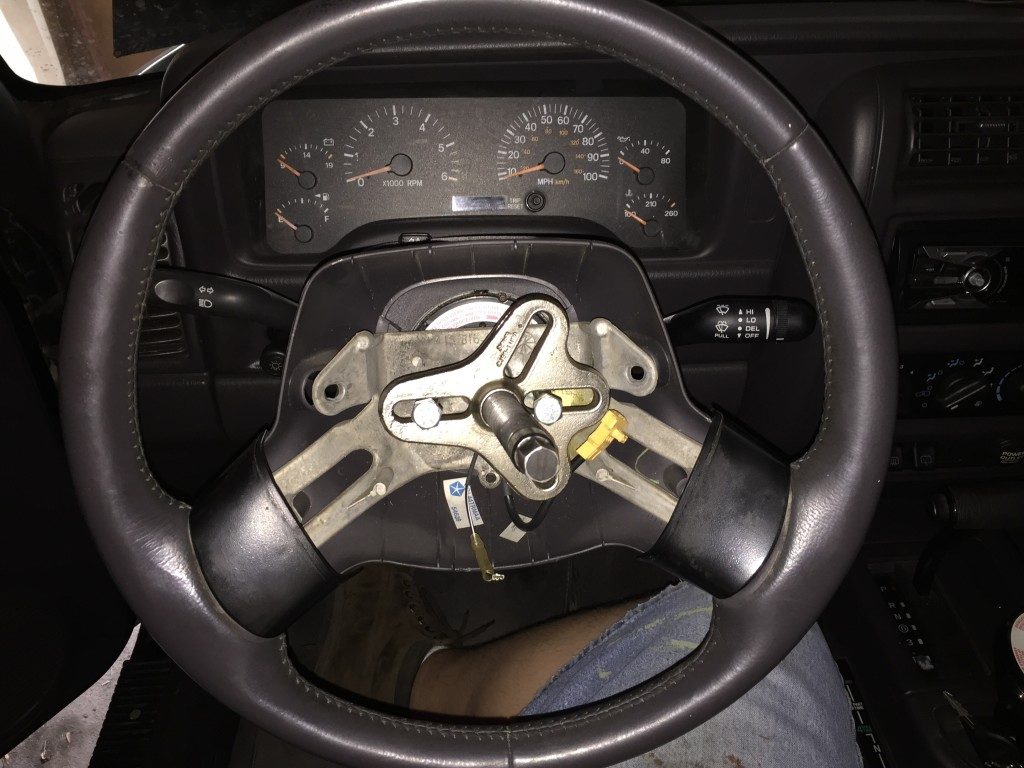
There is a single screw behind the little blank panels where the cruise buttons go – I believe it was a T20 torx then two 8mm (I think) bolts holding in the air bag. Make sure you pull the battery hours before pulling the air bag to avoid it deploying on you.
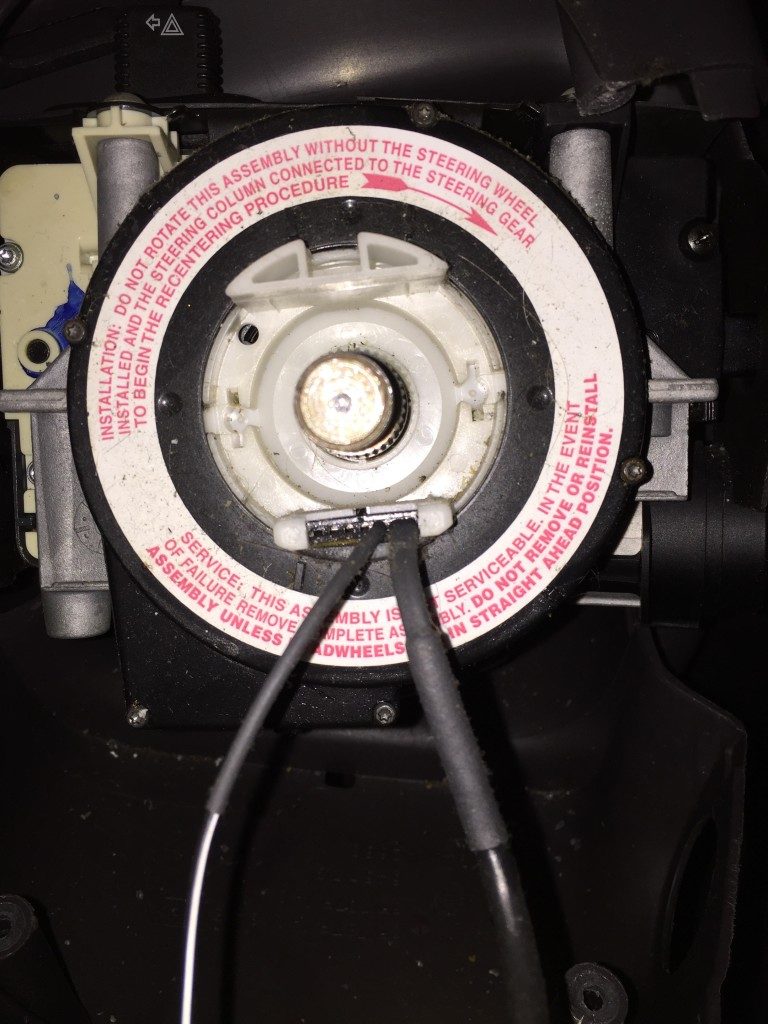
Once the wheel is removed there are three screws holding in the plastic surrounding the coil spring – they are all phillips head screws.
Remove the coil spring carefully by prying up on the top flange and then it kind of just pops out. Make sure to note how it’s situated so that the new one is installed the same way. I made sure to straighten out the wheel of the donor vehicle and then straightened out the wheels of my XJ so that they were at the same position.
Once that’s in then I re-assembled the steering wheel but made sure to connect the new buttons (obviously). They screw in from the back where the blanks were. Once it’s back together – cruise!

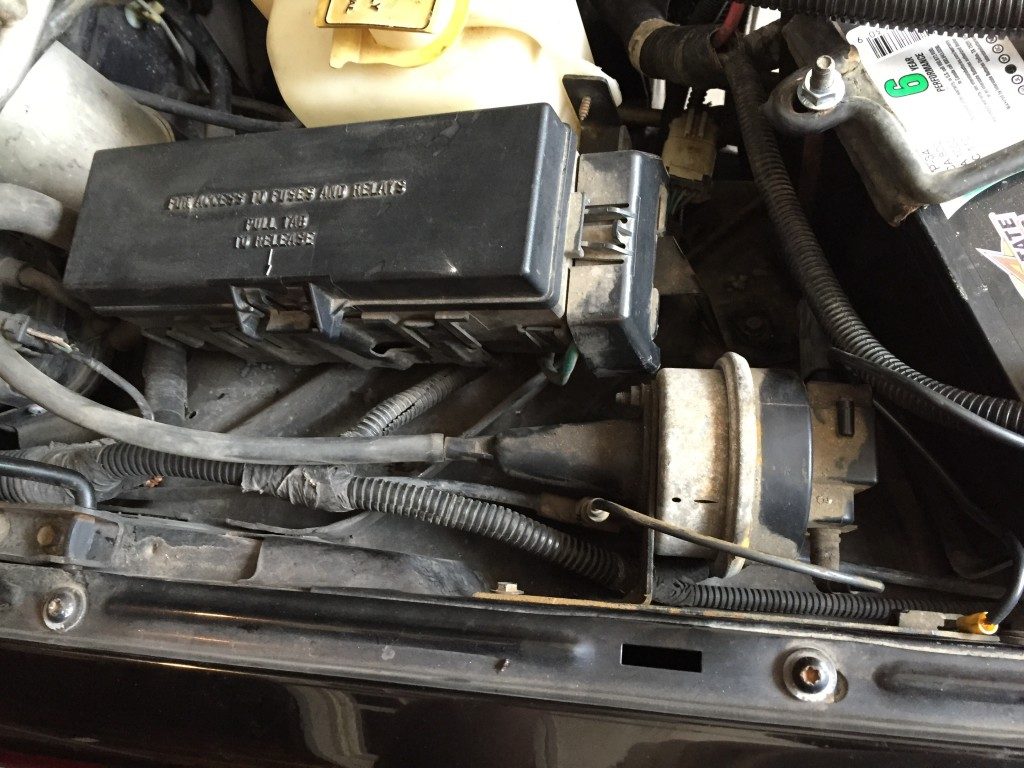
Then under the hood you install the actuator. The vacuum lines are already there. Just bolt it into the holes that are already there (make sure and grab the screws from the donor), connect the cable to the link on the throttle and plug it in to the plug that’s just lying there in the engine bay.
Cleaning up and Luxury
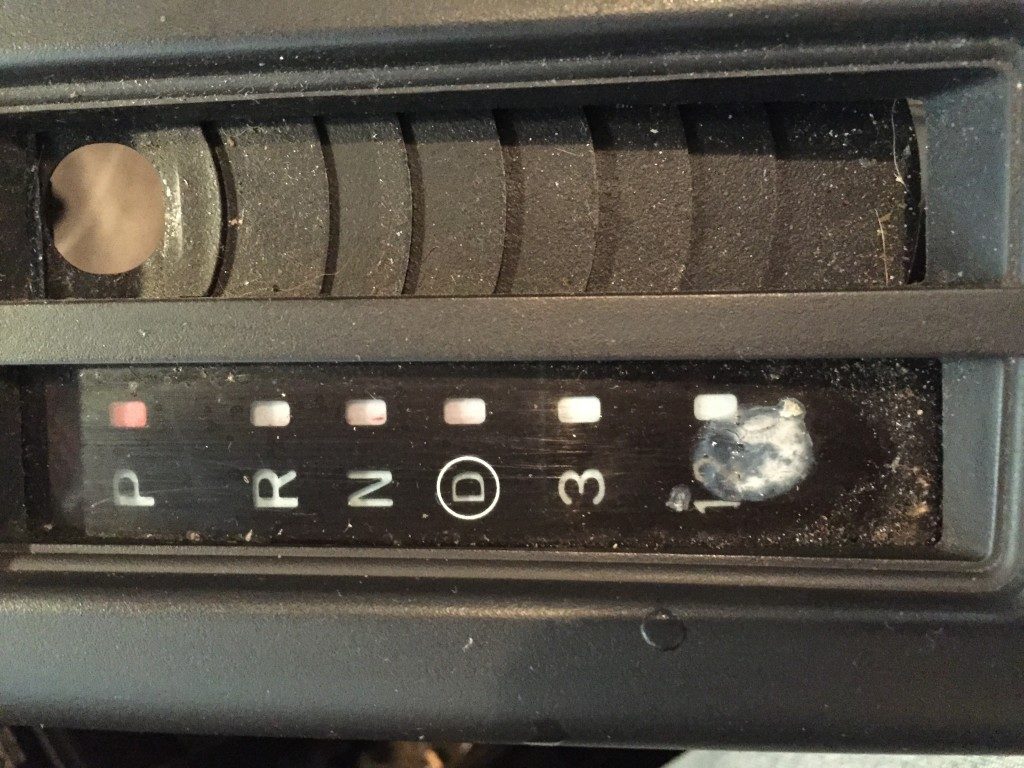
Since I bought my XJ I have had this weird circle in the plastic that shows the gears for the shifter. It’s driven me nuts:
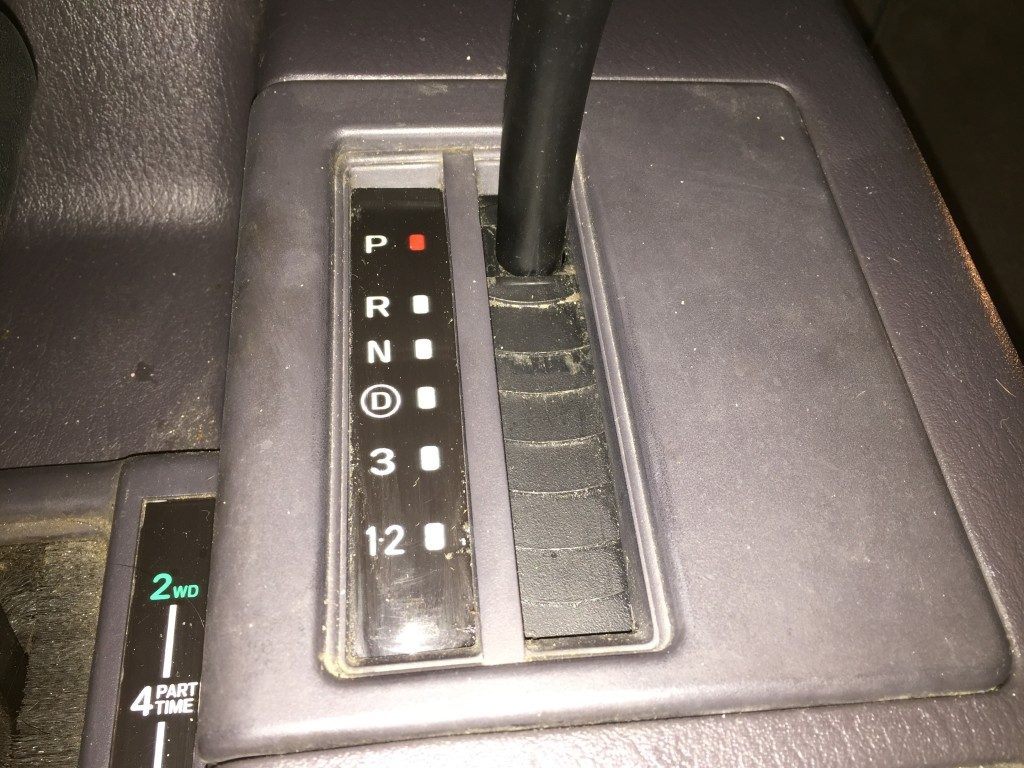
So while I was at the salvage yard I grabbed a new one that was in better shape:
I also snagged a wood grain dash and the piece with the factory fog light switch:
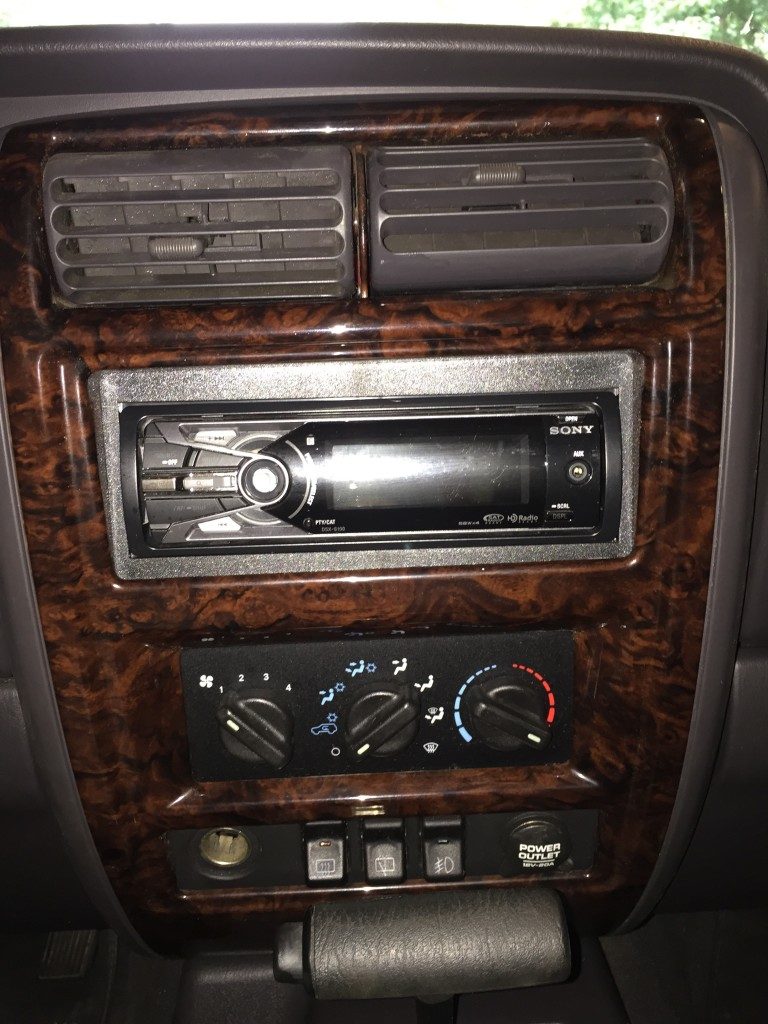
I’ve always loved that look so I was pretty excited when I saw that.
Suspension
Once I got cruise installed and tested (it worked!) then I went up to my dad’s where there are air tools. I’ve had the leafs and rear shocks for a month and was anxious to get them installed. Everything went smoothly … EXCEPT the shock bolts. All 4 of them snapped right off. If you’ve been following this you know that I am on a crusade against rust and made sure that when I was prepping the underbody for paint that this area in particular was clear of rust. These were the only 4 bolts that did not LOOK rusty from the outside and every one of them snapped right off – even after soaking in WD40 for hours. So, what should have taken a couple of hours, took from about noon to 9PM all because of those 4 bolts. On top of them breaking, one of them decided to add to the frustration and managed to snap my dad’s nice tap and die tool right in the hole. So then we had to dig that out of the hole. It was frustrating. And exhausting!
HOWEVER, the hard work paid off:
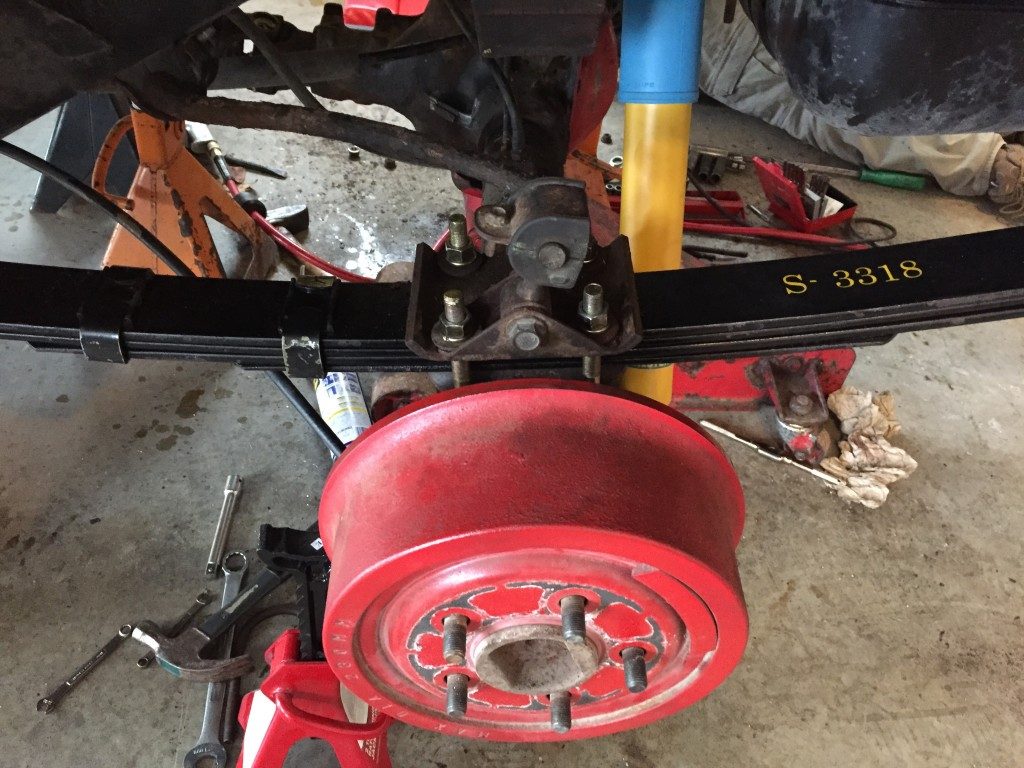
I wish I would have taken a pic of this before the new suspension and a better pic than this one after, but I measured from the center of the wheel to the bottom of the fender flare and I went from 17.5″ before to 20.5″ after – that’s with the Crown HD leafs. I’m pretty happy with it.
The Wheels/Tires
At 9:00PM on a Monday (I had yesterday/today off) I decided to drive 2 hours each direction to get a set of wheels. They are in fantastic shape and only cost $300 with 33″ tires on them. The tires are too big for what I want to do so I’ll sell them, but the wheels are exactly what I’ve been looking for – was totally worth getting back home at 1:30 in the morning for these:
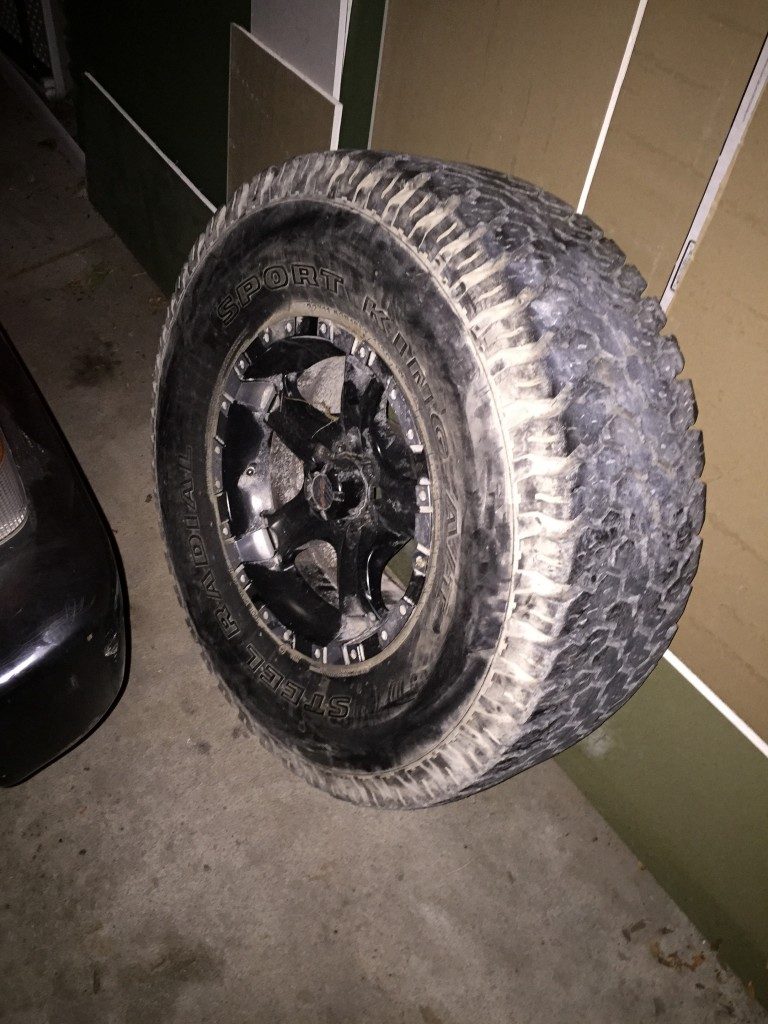
They are dirty in the picture but in great shape. They were apparently barely used. I’ve got 30×9.5 R15 General Grabber AT2 ordered and should hopefully be here by Friday so I can see how it all looks by the weekend. Pretty excited about these – I think they’ll look sweet on the XJ.
New Parts
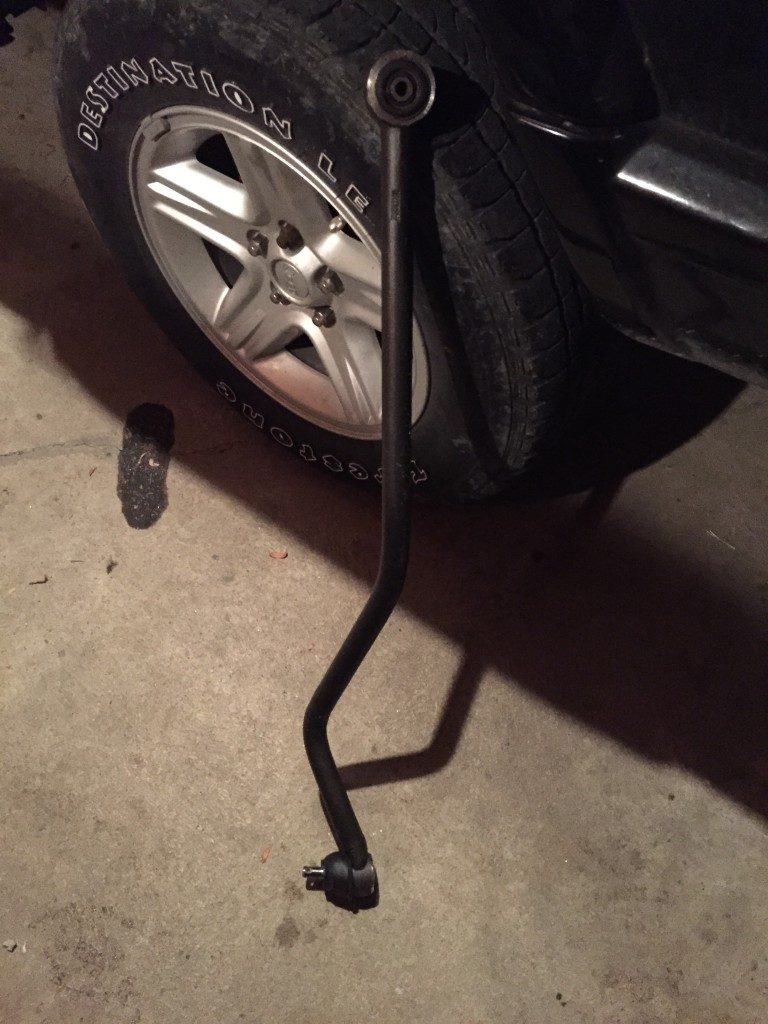
Today I finally received my new Moog Track bar. The bushing on the one in there now looks shot so I found this one on Amazon for only $65. Although it was crazy slow shipping, it’s a steal that I couldn’t pass up. Hopefully we’ll get this installed this weekend too.
Updates
My list of things to figure out has been shortened. This week I added the differential additive and that seems to have completely eliminated the knocking when backing up. On Friday I received the new heat shield from the dealership and, so far, I haven’t received any of the misfire codes and it hasn’t been running rough after a warm start. I also bought fuses last night before driving 2 hours at night so I could read the dash board. Now I’m just down to the vibration and knocking while turning – which will hopefully be resolved with new wheels/tires and a new track bar.